|
|
|
|
 |
|
|
|
|
|
|
|
|
|
J2R Scientific |
You may need the Adobe Acrobat reader in order to view the .pdf files available on this website.
Welcome to the projects area of TRCY. We want to cover robotics research projects aimed at beginners to the hobby of robotics and to school children who wish to learn about robotics and apply their interest in robotics to science in the class room and science fairs.
I personally see robotics today as being similar to the early days of powered aircraft. The robotics competitions carried out around the world remind me of what the early air shows must have been like. Robotics is still very open to the amateur and home brew builders, but as many others have come to believe, I too believe that to be a successful robotisist you need to have a bit of entrepreneurial business sense. I want my robots to be useful to others, not just myself.
As always I welcome your thoughts on our projects.
| |
|
| |
|
| |
|
| |
|
| |
|
| |
|
| |
|
| |
RoboStephen - In tribute to Stephen Colbert of Comedy Central's Colbert Report |
| |
|
EZ-Face - Making multiple face recognition - easy!
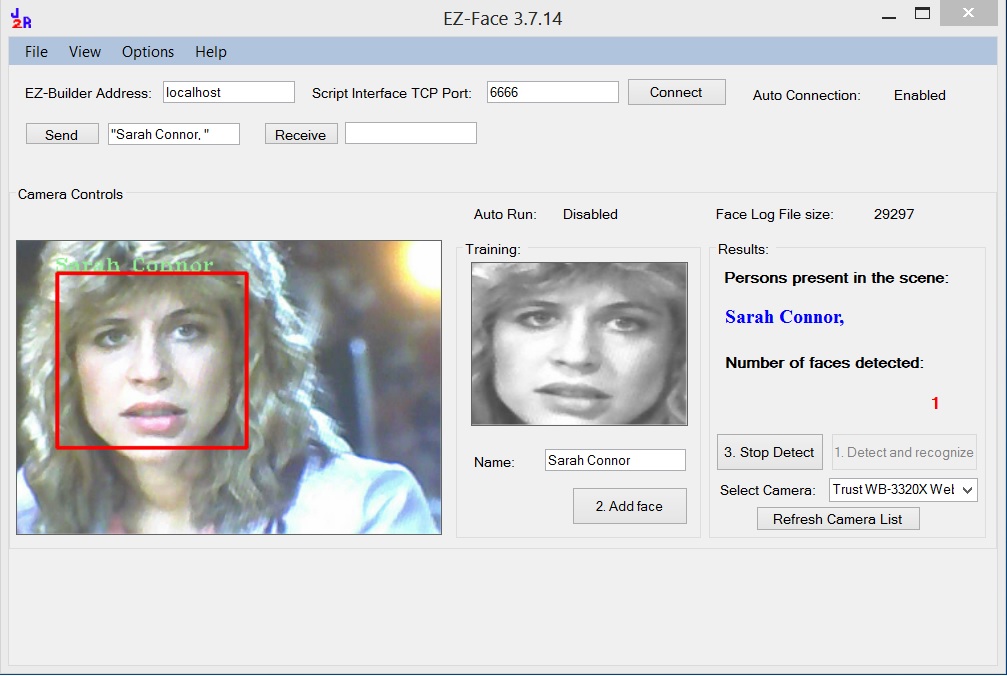 |
EZ-Face performs multiple face recognition. It has an interface for training faces and assigning names. When the application sees faces that are recognized the names are displayed and visually you'll see boxes around the faces with the names assigned. If a face is
detected but not recognized there will be a display of a box around the
face with no name. The more pictures of a face you train, the
easier it is for the application to recognize a face. Download the latest version from: http://www.j2rscientific.com/software
|
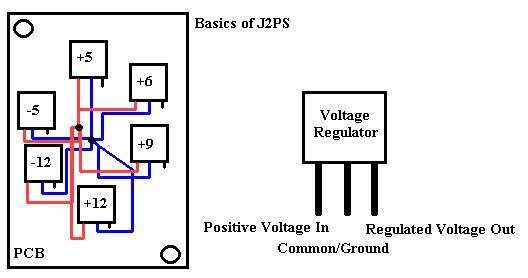
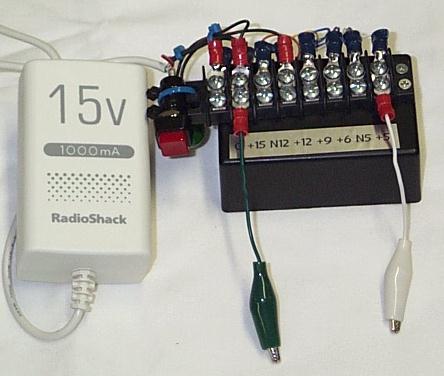
2.) J2R Scientifics' Experimenter's Power Supply
This project you can build yourself for under $50. Download complete plans in .pdf form here. This power supply is small enough to fit in a tool box, book bag or laptop case. It provides +12, -12, +9, +6, +5 and -5 volts in regulated DC. The circuit is simple and I recommend this project for all beginners. I use this exclusive to power my projects while testing and debugging. It's small enough I can even temporarily place it on my robots for mobile tests. And it's great to have instance access to all your voltage needs. Below is a simple schematic of the PCB and the finished power supply. Download J2PS.pdf for complete details, parts lists and costs.
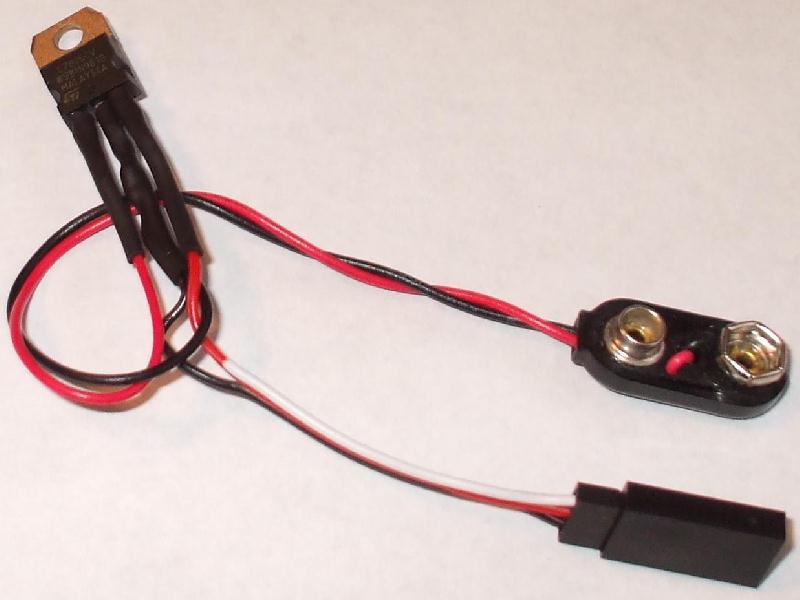
3.) 9Volt to 5Volt Harness for GBS301 Serial Bluetooth Link
The harness below uses a standard 7805 5 volt voltage regulator wires up to a 9 volt battery clip and a 3 pin servo port connector. Use heat shrink over the soldered wires to the 7805. You can use a servo connector to connect into the 3 pin port for quick connect/disconnect of the GBS301. You could use this harness to power almost anything.
4.) RoboStephen - In tribute to Stephen Colbert of Comedy Central's Colbert Report
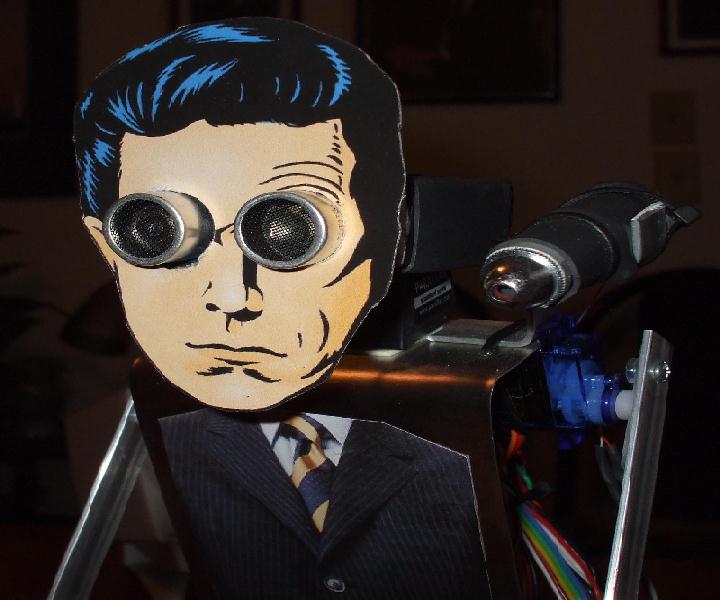
RoboStephen is based on the J2 robot. You'll want to download the J2 How To Guide here to build your own J2 robot. RoboStephen is customized from the standard J2 form. A head from a cartoon version of Stephen Colbert was placed over the PING sonar unit. A dress suit and tie sticker was made and placed on the chest. (2) TowerPro SG90 MicroServos were used to control the arm movement. Small arms were made with extra servo horns used as little fingers at the end of the arms.
A Emic Text-to-Speech module was added along with an external pocket speaker powered via a 9-volt battery. A tiny circuit was made with a green blinking LED and a1K resister. This was made to appear like the tracking device on Short Circuit's Johnny5. A modified laser pointer is also mounted above RoboStephen's left shoulder allowing him to "fire" his laser. One would assume this makes RoboStephen pro NRA.
On the front dual IRPD sensors were mounted for better edge detection. (The standard J2 design includes only 1 center mounted IRPD.) And a custom bracket to allow the 6 pack of AA's to be mounted underneath the robot in-between the drive servos. Another innovation is the liberal use of small blank mailing labels used to create cable labels for all the wires. This makes using the robot and troubleshooting SO MUCH EASIER!!!! Check out RoboStephen's YouTube videos below.
Videos:
YouTube
RoboStephen Demo
with Speech
YouTube
RoboStephen Dance
5.) Dress up a PING sonar unit from Parallax
If you are using the PING sonar unit from Parallax as the head of your robot you can dress it with some simple techniques. First, lets look at making a RoboStephen style face cover.
You'll need:
A PC with an Ink Jet or Laser Jet Printer
Large Sticker Labels, Avery #8255 for Ink Jet Printers (or similar
sticker
labels)
Thin Cardboard backing or poster board
A drill with a 3/4's spade drill bit
A PING sonar unit
An image to work with
Find a head image such as this one and place it in a word document to make it easier to size. You'll want the head image to be about 2 1/2" wide and 3 1/2" tall. Print this image out. Cut a rough square around the image leaving room around the image. Peal the backing off the sticker and stick to the thin card board. Carefully cut the image out.
Place the PING on the back of head and trace out where the PING sensors or "eye's" will stick though. Carefully and slowly drill out the eye holes. Place the PING sensors through the eye holes. The holes should be tight enough to hold the head onto the PING sonar unit.
You could use other heads like Robocop, C3PO, Storm Trooper, The Terminator to create a face place for the PING sonar.
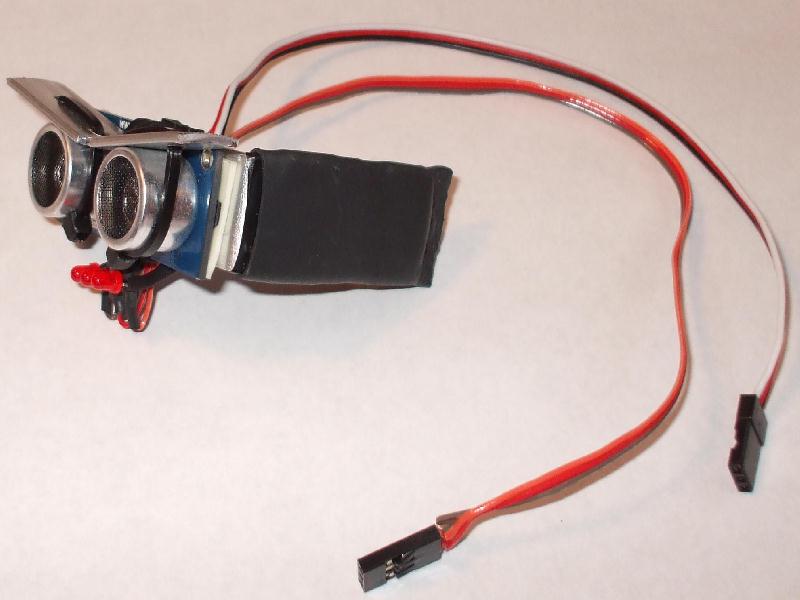
In this top view of the head you see how thin the finished face plate for RoboStephen is. The PING unit was then mounted to a servo via a bracket to move the head up and down. This face plate caused now inference for the sonar readings.
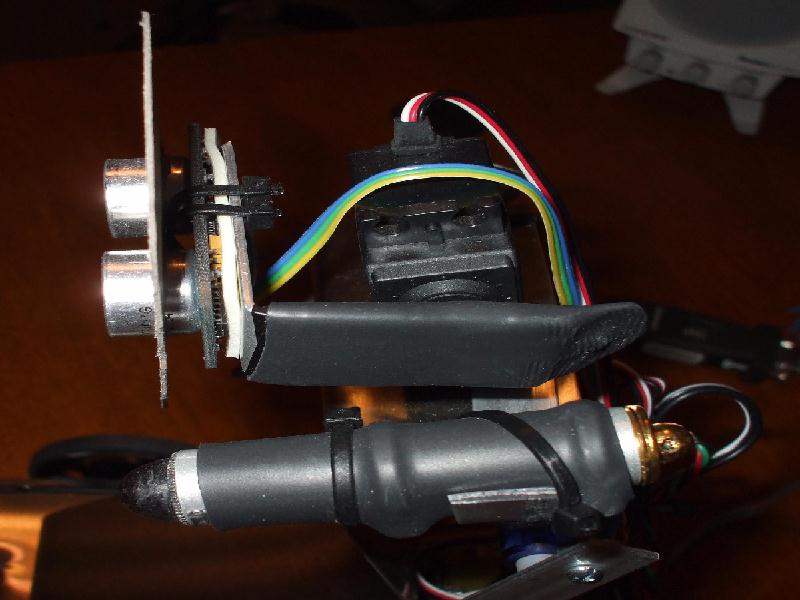
In this next opening the PING sonar model has thin metal strips cut out and wire tied around the sonar sensors to create Johnny 5 type eye brows. To complete the look 3 red LED's were wired in series to create a Johnny 5 type mouth. The interface pins of the PING unit were covered with heat shrink. The pins of the LED's fit through the pins of the PING unit and create a snug fit to hold the LED mouth in place.
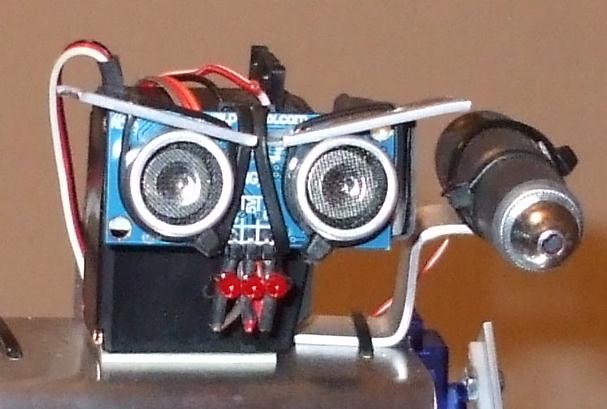
Above, notice how the wire ties hold the eye brow plates onto the sonar sensors. You want the wire ties snug, but not too tight. This will allow you to adjust the position of the eye brows to create different "moods" of the Johnny 5 face. Eye brows up means ready for attack, eye browns flat means natural feels and eye browns down means sad. You can also slip the eye brows one and off if you are careful.
Below is a close up the J2 Johnny head with eye brows plates and LED mouth. 1 cable is for the sonar, the other is for the LED mouth.
Parts Suppliers
Artificial Intelligences
Vision Research